
Teachable is among the leading online course platforms and is often a go-to choice for creators getting started in this field.
If you’re interested in creating a course on Teachable as well, read on.
We compiled this comprehensive Teachable tutorial to help you build your course on the platform and start selling it.
This guide will cover all the steps, from setting up your account to building the course curriculum and creating a sales page. In the end, we’ll also share some bonus tips to help you make the most of Teachable’s features.
Without further ado, let’s start.
1. Create a Teachable Account
To create a course on Teachable, you first need to create an account. Teachable offers a free plan and you can start with the same.
If you’re not sure about using Teachable as your course platform, first read this Teachable review.
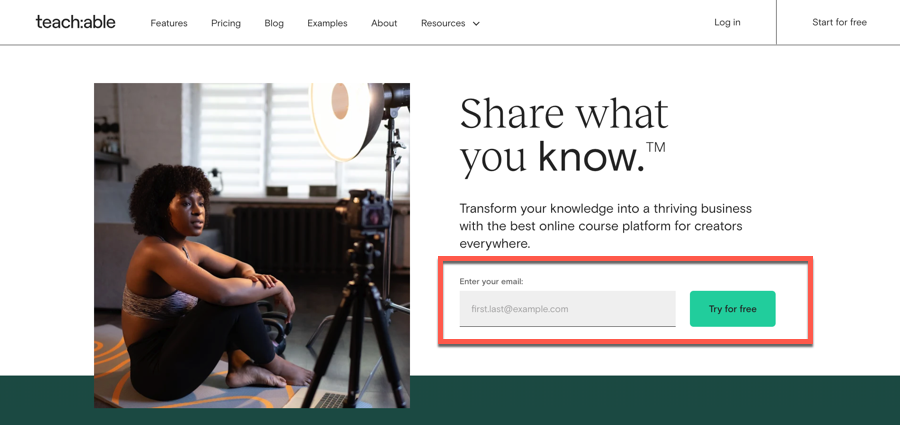
To create an account, go to Teachable.com, and you’ll see a signup box there. Enter your email address in the same and click on Try For Free.
Then, you’ll be asked to enter your name and create an account password.
Then, click on Create Account. You’ll be asked to provide additional information about yourself and your business, and afterwards, you’ll see your Teachable admin dashboard.

Teachable has a clean, well-organized admin area, so it won’t take much time to get used to the platform and figure out the different options.
Now, let’s show you how to create your first Teachable course.
2. Create Your Course Curriculum
Teachable has a drag-and-drop course builder, which lets you upload your content and design your curriculum quickly and easily.
To create a course, click on Courses under Products in the left sidebar. This will take you to the course area, where you can access your existing courses as well as create a new one.
Click the New Course button on the top right of this page.

In the next step, Teachable will ask you to come up with a course name and select the author, after which you can click on Continue.

Your course is now created, and you can start building your curriculum. To do that, click on Curriculum under the course menu in the sidebar.
This will take you to the course builder, where the course sections and lectures. Additionally, you can easily lectures and sections by dragging and dropping.
Here you’ll see New Section and Add New Lecture options, which you can use to add sections and lectures to your course.

When you’re satisfied with the structure of your course, it’s time to start uploading content into your lectures. To do that, click on Edit Lecture next to the lecture you want to add content to.
This will open the lesson editor, where you can add your content. On the left, you’ll see all the content types supported by Teachable, including videos, files, text, quizzes, etc.
For example, if you want to add a video to the lecture, click on Add Video.

You’ll then be able to upload the video file from your computer or even from cloud drives, such as Google Drive and Dropbox.
Another great thing about Teachable’s lesson editor is that you can add multiple content types to your lesson and arrange them in any order you want.

Finally, you can choose whether you want to enable comments for your lecture or not.
This is how you create a lecture and add content to it. You’ll need to repeat this process to create all your course lessons.
However, there is a smarter and quicker way to create course lessons as well.
Teachable has a Bulk Upload feature that lets you upload multiple files together, and the platform will automatically turn these files into lectures.
Using the drag-and-drop functionality, you can then arrange the lectures per your course structure.
This feature is available on all of Teachable’s paid plans and can be really useful if you have a lot of course material.
To upload online course content in bulk, click the Bulk Upload button in the top right corner of the builder. This will open the uploader, where you can import multiple files from your system or a drive.

Before moving to the next chapter, let’s show you how to create a quiz in Teachable.
Go to the lesson editor and click Add Quiz in the left panel. Now, you can add your quiz questions one by one.
Add the question into the question box and add the answers below. Make sure to check the box located on the left to select the correct answer.
You can then proceed to add more questions by clicking on Add Question. And if you want your quiz to be graded, enable that option at the top.

All the course lectures you create are in Draft mode by default, and you’ll need to publish them to make them inside your course.
To do that, go back to the course builder, select all the lessons you want to publish, and then click on the Publish icon.
Here you can also make certain lectures available for a free preview.

Your course curriculum is ready and now, let’s move on to the next step in this Teachable tutorial.
3. Manage Course Settings
The next step in creating an online course on Teachable is adjusting the course settings and ensuring that everything looks good.
Course Design Templates
Teachable offers templates for designing your course area. To access the templates, go to Design Templates from the sidebar.
Here you’ll see a template selected by default and all the options listed at the bottom. The available templates are Teachable Classic, Simple, and Colossal.
Teachable Classic is best for creators who want to focus on their course content; the Simple design offers a clean, simplified viewing experience; and Colossal showcases your curriculum and course information.
To select a particular template, click on the Activate option below that template.

You can also customize fonts, colors, text labels, and images with all three design themes, but each template look will be unique.
Content Dripping
Another important course setting is content dripping. This is an important tool for any course creator, as it helps you publish your lectures over time based on a schedule.
You can find the Drip settings in the main menu. Click on it and then select Set Schedule. You’ll see the window where you can insert the specific date or number of days after enrollment, after which the section should be released.

You can also create an email announcement for each section, and Teachable will email your students when that particular section becomes available.
Certificate of Completion
Teachable also allows you to send certificates of completion to your students.
To create a certificate, go to the Certificates menu in your course. In order to create one and attach it to a specific online course, click on the admin menu and select Certificates.

Teachable lets you choose from a library of certificate templates, and you can then customize the design and content using the editor.
You can add your logo, edit the text, include a signature, and change colors.

Once done, click the Finish button at the top of your screen, and Teachable will send this certificate to your students upon successful course completion.
Other Course Settings
Apart from these main settings, there are a couple of other settings you’d want to explore.
Go to the Information section. At the top, you’ll see a branding section, where you can upload your course thumbnail and the promo video.

When you scroll down, you’ll see course compliance settings. Here you can define how you want your students to progress through your course. There are three options available:
- Enforce Lecture Order
- Enforce Video Watching
- Enforce Graded Quiz Completion

Finally, on this page, you can change various course details, such as name, categories, URL, author, etc. Make sure you’ve taken care of these before moving on to the next step.
4. Set Up Course Pricing
After you’ve uploaded your course content and adjusted the settings to your liking, it’s time to set up the course pricing.
You’ll find the pricing settings in the course menu under Pricing. Click on Add Pricing Plan to set pricing.

Teachable gives you four different pricing options:
- Free
- One-time purchase
- Payment Plan
- Subscription

With a one-time purchase option, you’ll have to specify the currency and amount. Then, you can add a name, subtitle, and detailed plan description.

With a subscription, you’ll need to enter the currency, the amount, and the frequency of payments. You can choose to charge your customers weekly, biweekly, monthly, quarterly, and yearly.
Additionally, you can add a free trial period to your subscription plan.

You can add as many plans to your course as you want. For example, you can charge a one-time fee as well as a payment plan for your course.
Add an Order Bump and Upsell
Teachable offers two important conversion tools—order bumps and upsells—that you can use to maximize your order value.
With order bumps, you can offer an additional product for purchase on your course checkout page. If a user chooses to add the bump to their order, they can complete the checkout for both products together.
Go to Order Bumps and click Create Order Bump to add a bump.

Then, proceed by selecting the main product pricing and the bump product and its pricing plan. You can also add custom headline and description for your bump offer.


Talking about upsells, it also lets you sell other products, but it’s a post-purchase element, so you can offer upsells on your thank you page or inside your course lectures.
To add an upsell to your thank you page, go to the Pages section and select the correct thank you page, and you’ll see the option to add an upsell offer. Next, select the correct product and plan you wish to promote.

Once you’re happy with your settings, it’s time to move on to building your course landing page.
5. Build Your Course Sales Page
To start selling your online course, you need a sales page where you can provide all the information about your course and convince your visitors to make a purchase.
For each course, Teachable creates a sales page out of the box and you can access it by going to the Pages section in the course menu.

To edit the page, click on the Edit button next to it. This will take you to the page builder, where you’ll be able to customize your sales page.
Teachable’s page builder is simple to use and flexible. In the sidebar, you’ll see a list of all the existing page blocks, and on the right, you’ll see a real-time review of your page.
To add a new page block, click on the Add New Block option on the left bottom of your screen.

You can then select the block type you want to add to your page. As you’ll see, Teachable has blocks for showing a banner, image, text, video, course curriculum, pricing plans, etc.

To edit a page block, click on the block either in the left sidebar or in the content area on the right. Teachable will then show you the customization options available for that block.
Under the Content tab, you’ll be able to modify things like text, background image, button links, etc. On the other hand, you can modify the colors, button size, block spacing, etc. under the Design tab.

This is how you can add new blocks and edit the existing ones. Once you’re satisfied with your landing page design, it’s time to make some final adjustments and publish your course.
6. Final Settings and Course Publishing
Before you can share the course with your audience, you’ll need to give some final touches to your online school. Here are some of the things you should check:
Integrate a Custom Domain
When you create an account on Teachable, you get a Teachable subdomain for your school.
While you can keep it as your website address, we recommend you use a custom domain. You can set up a custom domain with any of the paid plans on Teachable.
To integrate your custom domain, go to Site -> Domains. Click on the Add Domain button at the top and enter your domain address.

You’ll need to do some configuration to point your domain to Teachable, and for that, please refer to the help article linked to on this page.
Integrate Your Email Marketing Tool
The importance of email marketing for online courses can hardly be overstated, so before publishing your course, ensure that your school is integrated with your email marketing tool.
This way, you can start engaging with your customers when they sign up for your course.
Teachable has direct integration with two email marketing providers—ConvertKit and MailChimp. If you use another provider (e.g., ActiveCampaign), you’ll need to use Teachable’s Zapier integration.

Integrate With Google Analytics
While Teachable has powerful reporting tools for courses, it doesn’t give you analytics for your website visitors. For that, you’ll need to use Google Analytics (GA).
Integrating with Google Analytics is straightforward. Go to Settings -> Integrations, and add your Google Analytics tracking code. That’s it, and you can now see your Teachable website analytics in your GA account.
As an additional tip, I recommend setting up Google Tag Manager as well, so you can track your cart abandonment rate on Teachable.
Make a Test Purchase and Check the Flow
We always recommend that course creators check the product and the purchasing experience from the student’s point of view before going live.
To check the same for your course, you can create a 100% off coupon code. You can then make a purchase in a private window to test the entire flow.
If everything seems to be working as expected, go back to your course in the admin area and click on the Publish button to make it live.
Your course is now ready, and you can start sharing it with your audience.
Bonus Tips to Take Your Teachable Course to the Next Level
Before we close this Teachable tutorial, let’s get into some bonus tips that will take your course to the next level.
Create a Circle Community to Drive Engagement
Teachable doesn’t have a native community feature, but it does integrate with Circle.so to create a community and tie it to your Teachable school.
Circle is one of the most popular platforms for online community hosting, and it can help you drive engagement in your course and connect with your students on a deeper level.

Teachable supports a single sign-on integration with Circle, so your students can access the courses and the community with the same login. You can also embed a Circle community space in your course lectures to direct your students toward the relevant discussion spaces.
Offer 1:1 Coaching to Your Students
Besides online courses, Teachable also allows you to run a coaching program. Coaching complements online courses really well, and many Teachable creators use it to offer more personalized support to their students and also increase their revenue.
With Teachable Coaching, you can define milestones, track and measure client progress, keep notes, and send messages to your students. Moreover, it integrates with Calendly for scheduling, so arranging a coaching session is never a hassle.

Bundle Multiple Courses to Sell Together
As Teachable supports bundles, you can sell two or more of your products at a new price. For example, you can sell online courses, coaching, and digital downloads as part of a bundle and sell it at a higher price.
Or you can also use this feature to build a membership site. For example, you can bundle all the courses on your school and charge a monthly fee for continued access.

Launch a Student Referral Program
Teachable supports referral programs, which allows you to turn your students into ambassadors.
Your students will then be able to share your courses with their friends through a unique referral link, and when someone uses it to sign up for a course, the referrer will receive a discount on their next purchase.

Referral marketing is a great way of spreading the word about your school and courses by incentivizing your students to share it with their friends.
Summary
In this Teachable tutorial, we covered all the steps you need to take to build and launch your online course on the platform. We also shared some tips and ideas to help you make the most of the platform’s features.
Teachable stands out from the competition thanks to its ease of use and robust course creation tools. Even as a newbie, creating a solid course on Teachable isn’t complicated.
If you aren’t using Teachable yet, create a free account to start building your first online course.
Do you have any questions about Teachable or using the features? Ask them down below, and we’ll be happy to answer.


